
Published May 31, 2024 · Updated June 18, 2024
This guide is designed to help you understand the VATS Key and determine which resistance value your Corvette’s Body Control Module will respond to.
VATS Explained
The VATS acronym stands for Vehicle Anti-Theft System; it is also known as the PASS-Key or Personal Automotive Security System.
Each VATS key contains a resistor embedded in the key blade. There are 15 possible resistance values for these resistors, and the resistance value of a VATS key is referred to as the VATS code. These resistors can also be called resistor pellets, VATS Pellets, or VATS Chips.
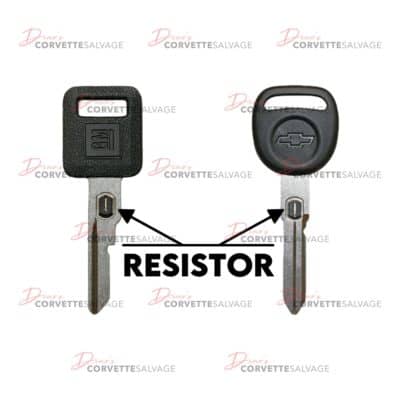
When inserting the VATS key into the ignition lock, the resistor on the key blade makes contact with two points inside the ignition lock. Once the resistor touches the contacts, the VATS system reads the resistance value of the inserted key. The car will start if the VATS key has the correct resistance value. However, the Corvette will disable itself for four minutes if the wrong key is used and the VATS reads an incorrect resistance value.
Before purchasing a new VATS key, you must determine the VATS code corresponding to your Corvette.
Determining Your VATS Code
OPTION A: If you have a working VATS key…
You can determine the VATS code of your working key by decoding it. To correctly decode the key, you will need an OHM meter.
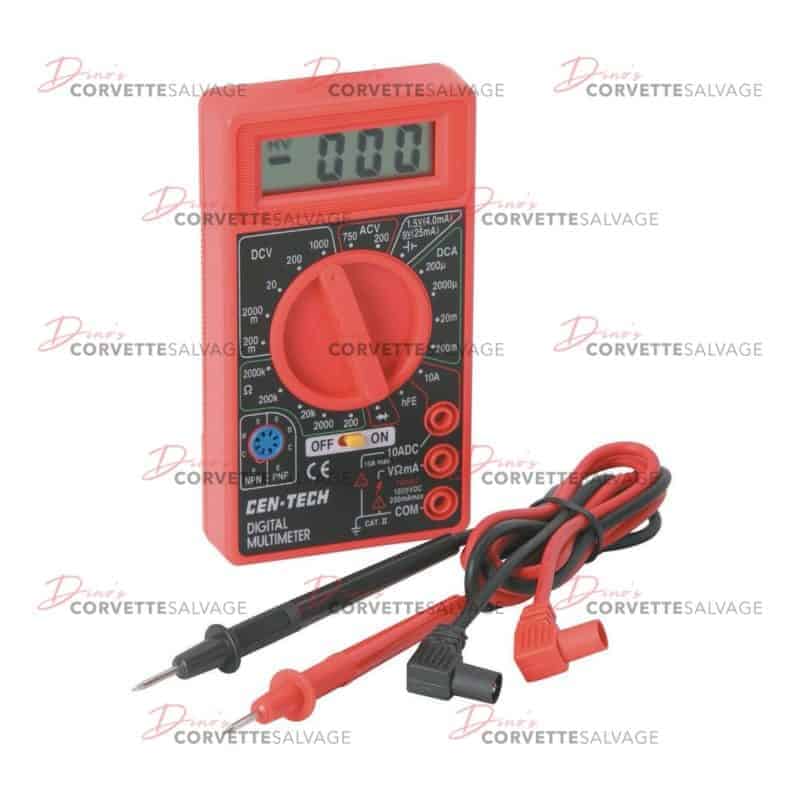
C4-C5 New VATS Key Ohm Meter 1986-2004
35.00This part is a new, aftermarket C4 to C5 VATS Key Ohm Meter which can be used to diagnose the VATS Code on a 1986 to 2004 Corvette VATS Key.
SKU: C4C5-VATSKOM-8604 View cartNOTE: The resistor inside all VATS keys has metal prongs that stick out from both sides of the key blade (See Figure 1). These metal prongs make contact with two contacts inside the ignition lock, allowing the VATS system to measure the resistance value of the key.
If you have an OHM meter, follow the instructions below to decode your key.
- Make sure your OHM Meter is set to 20k.
- Place one lead of the OHM meter on the metal prong on one side of the key
- Place the other lead of the OHM meter on the metal prong on the opposite side of the key.
- A resistance value will be measured and displayed by the OHM meter.
NOTE: The OHM meter leads should only make contact with the metal prongs of the key resistor and not the key blade to obtain an accurate reading. - Use the chart below to convert the OHM meter’s resistance value to the proper VATS code.
NOTE: Remember that the resistance value indicated by your OHM meter may not exactly match the intended resistance value shown in the chart below. However, your recorded resistance should fall within the chart’s minimum and maximum resistance values (typically within a 3 to 5 percent difference). The closest resistance value on the chart to your recorded value will correspond to the correct VATS code for your Corvette.
| VATS Code | Designed Ohms Resistance Value | Minimum Ohms Resistance Value | Maximum Ohms Resistance Value |
| #1 | 0.402k (402) | 0.386k (386) | 0.438k (438) |
| #2 | 0.523k (523) | 0.502k (502) | 0.564k (564) |
| #3 | 0.681k (681) | 0.650k (650) | 0.728k (728) |
| #4 | 0.887k (887) | 0.850k (850) | 0.942k (942) |
| #5 | 1.130k (1,130) | 1.085k (1,085) | 1.195k (1195) |
| #6 | 1.470k (1,470) | 1.411k (1,411) | 1.549k (1549) |
| #7 | 1.870k (1,870) | 1.795k (1,795) | 1.965k (1965) |
| #8 | 2.370k (2,370) | 2.275k (2,275) | 2.485k (2485) |
| #9 | 3.010k (3,010) | 2.890k (2,890) | 3.150k (3150) |
| #10 | 3.740k (3,740) | 3.590k (3,590) | 3.910k (3910) |
| #11 | 4.750k (4,750) | 4.560k (4,560) | 4.960k (4960) |
| #12 | 6.040k (6,040) | 5.798k (5,798) | 6.302k (6302) |
| #13 | 7.500k (7,500) | 7.200k (7,200) | 7.820k (7820) |
| #14 | 9.530k (9, 530) | 9.149k (9,149) | 9.931k (9931) |
| #15 | 11.800k (11,800) | 11.328k (11,328) | 12.292k (12292) |
OPTION B: If you don’t have a working VATS key…
If you don’t have a working VATS key, the Crew at Corvette Salvage has created a detailed procedure to assist you in identifying your Corvette’s VATS Code. Before you begin, please purchase the VATS Key Resistance Decoder Kit below. This kit includes the required resistors, which will be used throughout this guide.
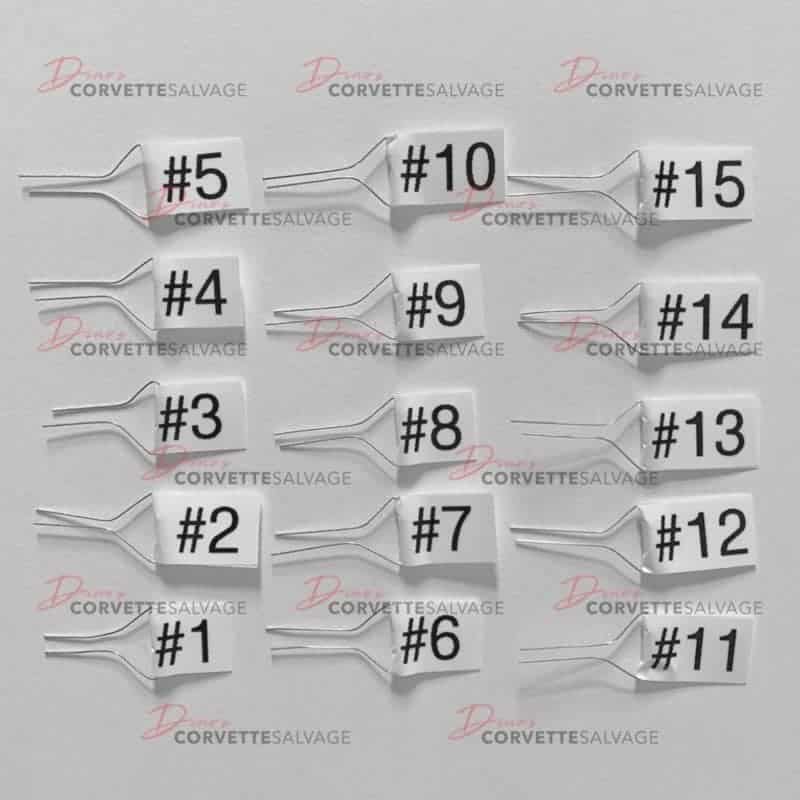
C4-C5 New VATS Key Resistance Decoder Kit 1986-2004
69.95This part is a new, aftermarket C4 to C5 VATS Key Resistance Decoder Kit which can be used on a 1986 to 2004 Corvette.
SKU: C4C5-VATSKRDK-8604 View cartOnce you have the VATS Key Resistance Decoder Kit, follow the steps below:
Step 1: Disconnect the ignition cylinder wire that plugs into the dash harness at the base of the steering column (See Figure 2). From now on, we will ONLY work with the dash harness plug.
NOTE: On a C4 Corvette, the ignition cylinder wire has two white wires running into an orange case.
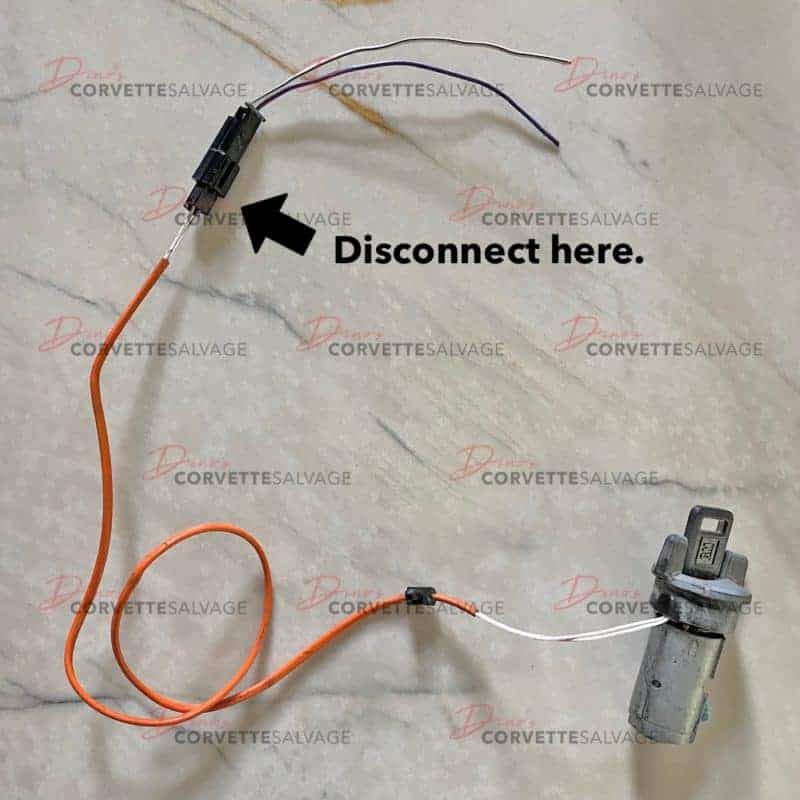
Step 2: After disconnecting, locate the two metal pins on the back side of the plastic dash harness plug. (See Figure 3) They may be tough to see without sufficient lighting. We have attached a picture to highlight the metal pins. You may need to bend the wires on the back of the plug to gain access to them.
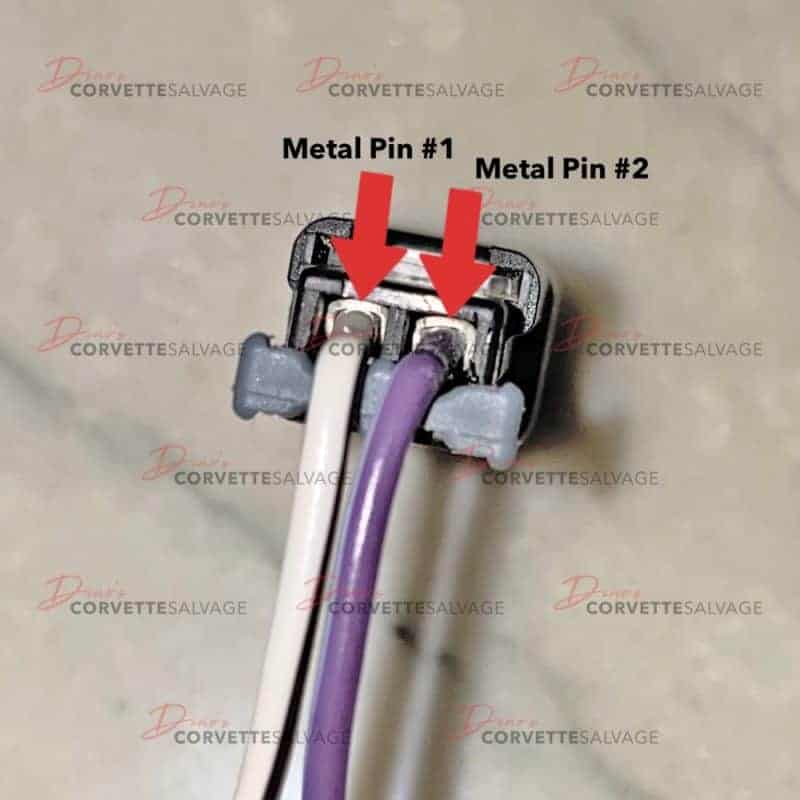
Step 3: Take the resistor labeled #1 from the kit purchased above and bend the two metal ends to form a U shape with the two metal prongs sticking up.
Step 4: Use these two prongs and make them contact the two metal pins on the back side of the plastic dash harness plug. Make sure the metal prongs from resistor #1 stay touching the metal pins before proceeding to the next step. It is best practice to gently push the metal prongs as far into the back of the dash harness plug as possible. You want to guarantee that the metal prongs touch the plug’s pins.
Step 5: With the resistor’s prongs touching the metal pins, use any key to try to start the Corvette. If the Corvette starts, your VATS Code is #1, and you are done!
If your Corvette does not start:
For 1986 to 1989 and 1997 to 2004 Corvette models:
- YOU MUST WAIT 4 MINUTES before trying resistor #2. You can wait more than 4 minutes, but no less than 4.
- After 4 minutes, remove resistor #1 from the plug and start again at Step 3. However, this time use resistor #2.
- Keep cycling through the numbered resistors until you find the one that allows your Corvette to start. Remember to wait at least 4 minutes between each cycle.
For 1990 to 1996 Corvette models:
If you have a 1990 to 1996 Corvette, follow the table below for wait times between each attempt. For the first three attempts, you must wait FOUR minutes. For every attempt after the third, you must wait TEN minutes. (Special thanks to Dave Perry for pointing this out!)
- After waiting for the required minutes in the table below, remove resistor #1 from the plug and start again at Step 3. However, this time use resistor #2.
- Keep cycling through the numbered resistors until you find the one that allows your Corvette to start. Remember to wait the required number of minutes between each cycle.
| After Attempt # | Minutes to Wait Before Trying the Next Resistor |
|---|---|
| 1 | Wait 4 Minutes or More |
| 2 | Wait 4 Minutes or More |
| 3 | Wait 4 Minutes or More |
| 4+ | Wait 10 Minutes or More |
Once you have found the VATS Code for your Corvette, you can use it to order the appropriate key blank. After ordering the key blank, bring it to a local locksmith to get the key cut to match your ignition lock.
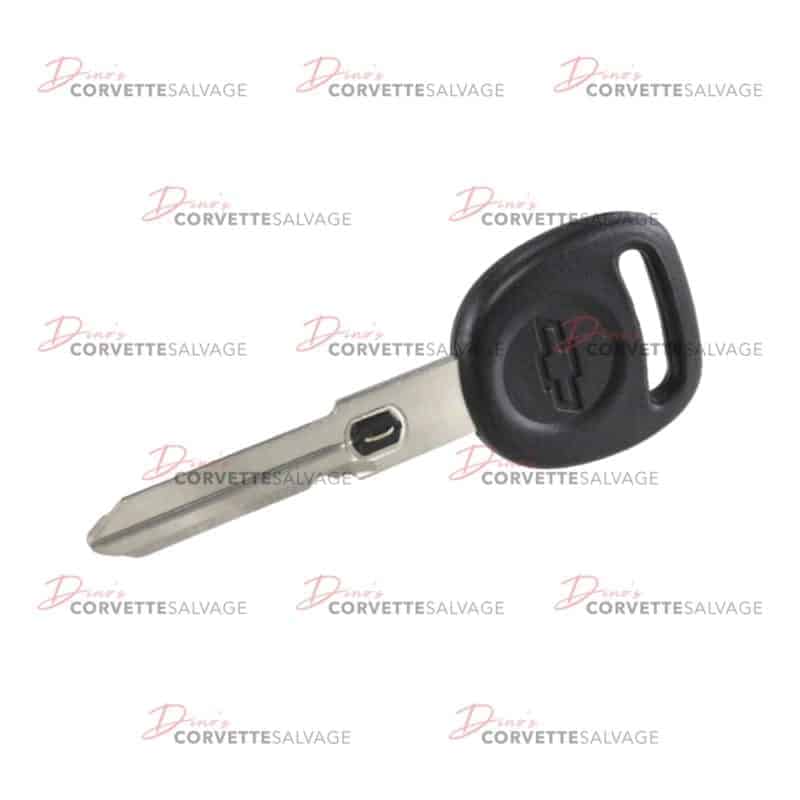
C5 New VATS Ignition Key Blank 1997-2004
30.95This part is a new, reproduction C5 VATS Ignition Key Blank which can be used on a 1997 to 2004 Corvette.
SKU: C5-VATSIKB-9704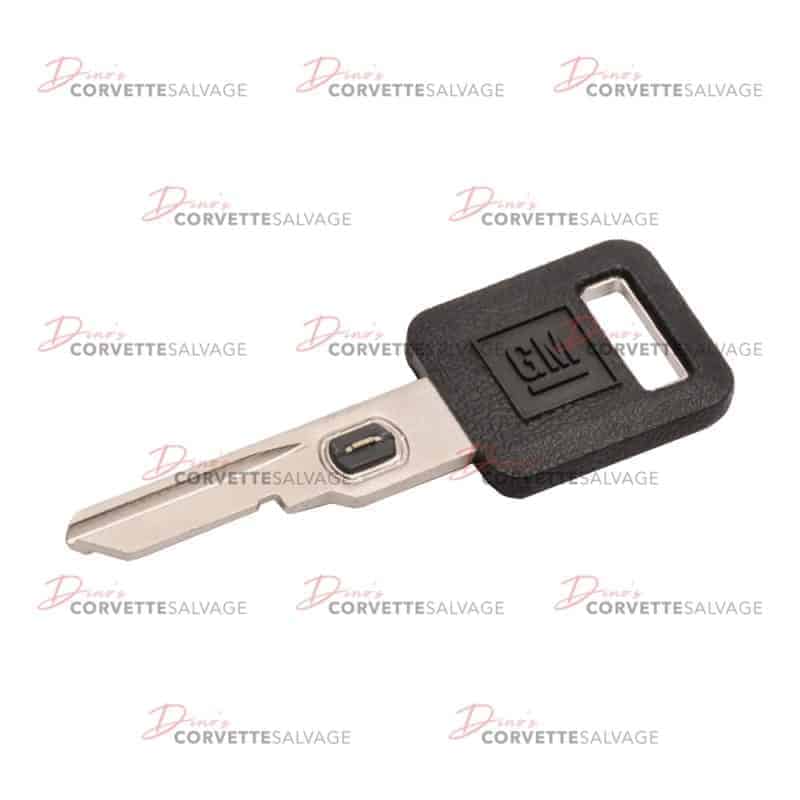
C4 New VATS Ignition Key Blank 1986-1996
17.95This part is a new, reproduction C4 VATS Ignition Key Blank which can be used on a 1986 to 1996 Corvette.
SKU: C4-VATSIKB-8696More in How-to guides
- C5 Corvette Buyer’s Guide (1997–2004): Best Years to Buy, What to Avoid, and What to Check
- C6 Corvette Buyer’s Guide (2005–2013): Best Years, LS2 vs LS3, and What to Buy
- Understanding the C6 Corvette Body Control Module: A Guide to Replacement and Reprogramming
- Understanding the C6 Corvette Keyless Entry Module: A Guide to Replacement and Reprogramming